Showing posts with label yellow. Show all posts

Wednesday, November 9, 2011

dream home - pinterest style

Pinterest is so great.  I know I've sung its praises before, but it's just such a good organizing tool for all the inspiration you can get on the internet.  Plus I use it to find recipes, gifts, workouts, clothes, vacation ideas...
I pin a lot of ideas to specific rooms to keep my boards organized, but I also have a "Lovely Rooms" board that isn't what I'd put in a certain room in my house, but just because they're so pretty and I like to look at them and ooh and ahh over them.  So here are some beautiful rooms I've found via pinterest.

These first two pictures are all about my love of cabins.  They just make me feel so cozy and happy.  All the wood and the snow outside and the fireplace, makes me want to bundle up by the fire in my PJ's with a good book and some hot chocolate!
wood and stone cabin with picturesque snow and mountains outside
via
wood and stone winding staircase, candle chandelier in a cabin-style home
via
child's room, bunk bed spans entire length of wall, alcove with desk and chair underneath with curtains to close for privacy
via
Isn't the room above so cute? It looks like both kids sleep up top and they put two mattresses together to span the wall, then they have their secret alcove down below.  I would've loved this when I was little.

ultra modern dining room with black table and reflective shiny silver tin ceiling tile with texture
via
Isn't this dining room/kitchen awesome? Love the modern table and chairs, and OH MY! at that silver ceiling tile!

bedroom with wood beam headboard and tucked fabeic headboard with branches and driftwood style side table and bench
via
More of my wood/cabin love coming out.

window seat bay window in a dark teal room with yellow and chartreuse pillows
via
I'm a sucker for window seats.  More of my curling-up-with-a-good-book-and-hot-chocolate fantasies coming out.  I love the dark walls (they look almost teal) with the yellow/green chartreuse accents.  Not a huge fan of that mop on the floor, but look how awesome that chandelier is!


So, what do you guys think? I'd love for you to send me your pinterest links so I can see what you've been obsessing over!

Thursday, September 8, 2011

DIY Painted Birch Tree Wall Forest Mural

diy wall painted birch tree wall art mural gray yellow white

I’ve wanted a birch tree wall mural for so long… in case you haven’t noticed from my etsy shop, my living room décor, or my pinterest account, I’m a little obsessed with trees, branches, and woodgrain anything. So when I decided to redo my office and I knew it would be my area and I could do whatever I wanted, I determined I had to have a wall-o-trees. I did a lot of research and looked at vinyl tree decals, but I decided since I can make my own tree art with a computer then I should be able to make my own tree wall mural with paint. Here are the two pictures I used as my inspiration (the one on the left is my own art, the one on the right is a vinyl decal.)
birch tree wall painted decal aqua red bird owl
Left: Aqua Blue Forest with Red Birds by Priss Designs on etsy; Right: Wild Birch Forest with Owl Wall Decal by designedDesigner on etsy.


The only supplies you need to paint your own birch tree wall are painter’s tape (I love the 2” wide green Frogtape, I think it works so much better than the blue tape), an X-acto knife, and paint. 
frog tape x-acto martha stewart white paint painting a diy wall tree mural
Frogtape; Martha Stewart Paint; X-Acto Knife

 To begin, tape two straight-ish lines for each tree, flaring them out slightly at the bottom. Don’t push your tape too tightly onto the wall at this point. I just randomly made little groupings of trees, although looking back I wish I had done 1-2 more trees instead of having the two bigger spaces, but I couldn’t go back in and add them without it looking weird and cluttered. 
taping trees for tree wall art mural painting


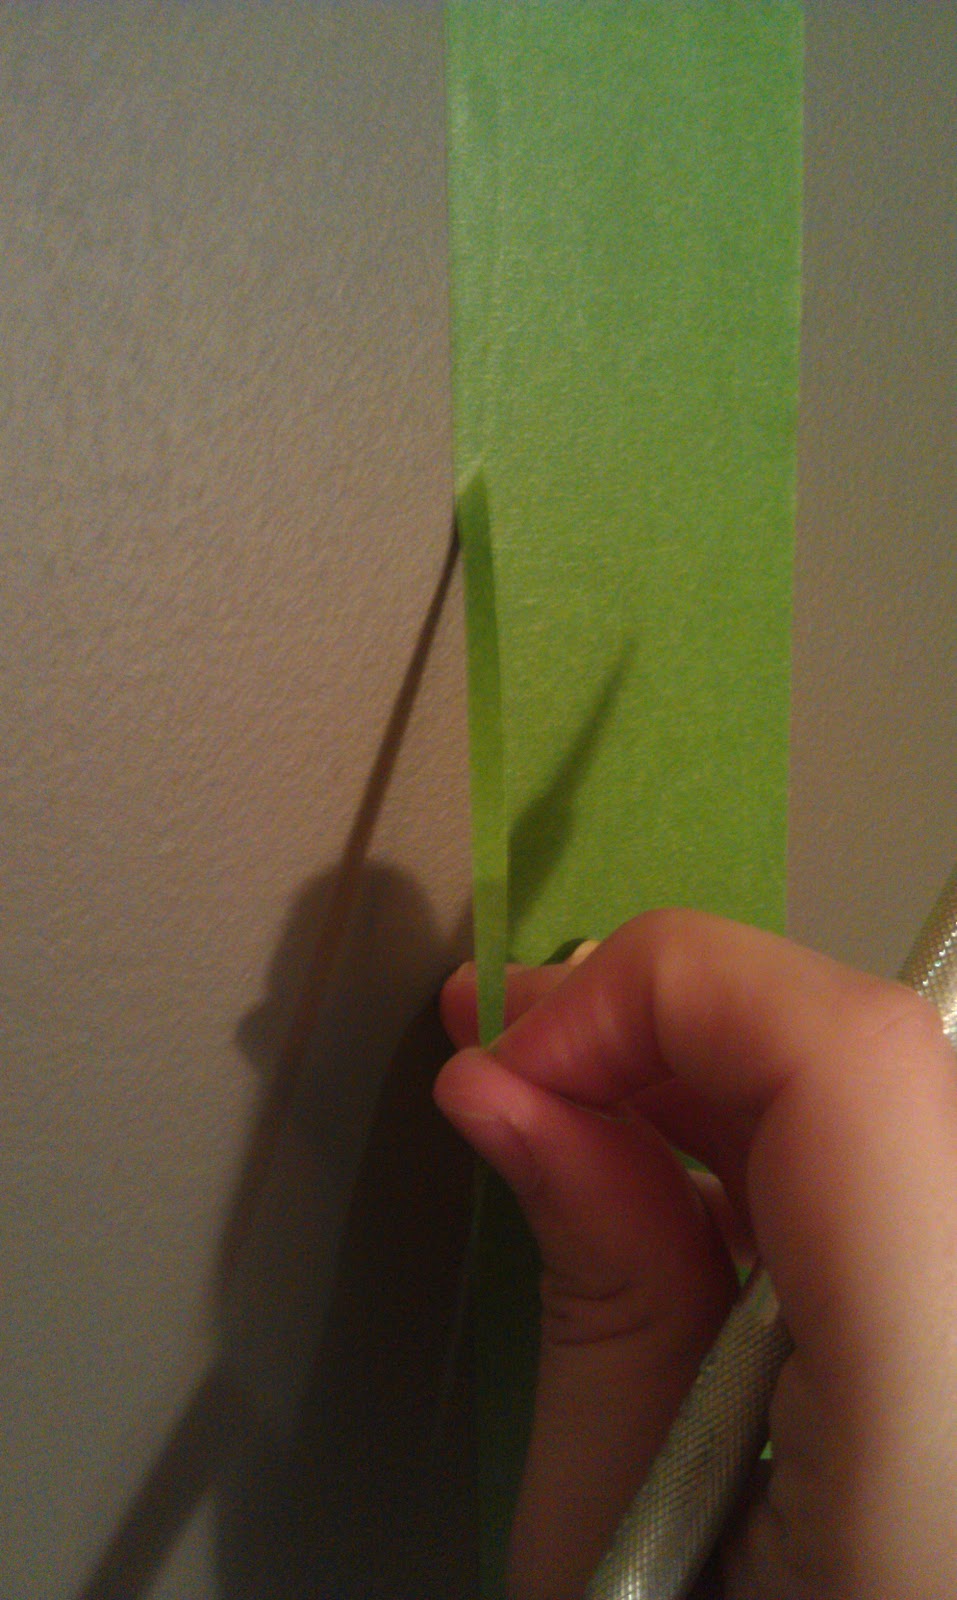
Next, using your X-acto knife, cut slivers of your tape out so your tree isn’t just straight up and down. Think about a real tree and how it has knots sticking out- To begin with, I was just cutting little slivers out of short sections, but by the end I was literally running my X-acto from the very top of the tape to the bottom, weaving slightly in and out as I went down, and it ended up being much easier to remove the tape that way. If you have a brand new super sharp X-acto, you really don’t need to push hard at all on the tape, just lightly score the surface and when you pull off the cut part, it will naturally want to break at your score line. I did need to go back and re-cut parts that tried to tear at the wrong points, and I did make a couple too- deep cuts in my wall (but you can’t tell now that everything is painted), but I really think if you don’t push the tape down too hard to begin with then the tape-wall bond won’t be as strong and the tearing off part will be easier. 
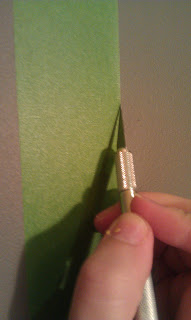
taping and using knife to cut trees for painting diy wall art mural

No lie, the taping/cutting part probably only took me about 30 minutes. Just eyeball your trees and then go to town with your X-acto knife. 

Next, I decided I wanted a few branches to fill in the spaces between the trees, and I used my tree artwork as inspiration for my branches. Looking at my wall now (and considering the extra work it cost me- I’ll get to that later), I’m not sure I’m in love with the branches. Although someone who has seen it now that it is finished said the branches make it look more like trees (you know, for people who haven’t been lusting over tree walls for years like me, they might not immediately realize that lines on a wall are supposed to be trees). I used my tape to “draw” some rough branch shapes then used my X-acto to cut out the actual shape I wanted. You also have to cut through the part of your original tree’s tape to connect the shapes. 
creating branches for diy wall art tree mural birch trees
Making the branch shapes
creating branches for diy wall art tree mural birch trees
After cutting branches out

When you are finished with all your cutting, then go around the edge of the tape that you will be painting on and really push down on the tape, trying to adhere it as well as possible to the wall. I use a couple fingers or the heel of my palm and rub back and forth. I’ve also heard of using the bottom of a spoon to go around everything. And just on a side note, if you are doing a smaller project and really want crisp paint lines, you can use clear nail polish along the edge of the tape and let it dry, and it seals the tape line so no paint can get under the seal. I did it when I painted one tree on my niece’s wall, but a lot of trees on a big wall would need a whole lot of nail polish! 

Anyway, so now you’re ready to paint! I got my white paint from the Oops bin at Home Depot, $7 for a gallon of Martha Stewart paint, so I think it’s a pretty good deal… not sure why it was in the oops bin, it said “bright white” and the paint looked pretty bright white to me, but maybe they tinted it a little or something. 

I painted my first coat with a small paint roller and it looked like this: 
first coat of white paint on gray wall for diy wall tree painting

Not so great, I know. My husband came downstairs and said “whoa, how many coats are you gonna have to do to cover the gray?”… probably should’ve primed it, but oh well. Well, the answer is three. Three coats of paint. After using the roller for the first coat, I used a paint brush for the second two coats and it really didn’t leave paint strokes and it covered a million times better. 
third coat of white paint on gray wall for diy wall art birch tree painting

After my third coat of paint, I got to the “birch bark” part of my trees. While my tape was still in place, I just started painting lines with a smaller paint brush… some were more like long U’s, some were just straight, some were more like little sideways U’s, and I made a couple ovals that looked like knots. I just kinda free-handed it on the first tree, then took off the tape after a couple minutes to make sure I liked how it was looking before I did the rest of my trees. A couple tips from a design standpoint: I think it looks a little better if you have more “bark” on one side of all your trees (as in, left instead of right) just because there would be more shadows on one side of your tree in a forest. Also, keep in mind that you can always add more, but you can’t take away (well, I guess you could paint over some lines with your white paint again if you wanted less lines, but that would be extra work. So, I did my bark on all my trees, and then removed the tape! This is the exciting part, when you really start to see your vision coming together. 

painting birch bark cutouts on trees diy wall mural
I loved my trees… the branches, not so much. They looked all huge and wonky and I was really considering completely painting over them, but then I decided I just needed to make them skinnier. So I freehand painted around them with a smaller paintbrush. I also went back and filled in some of my “bark” with an even smaller round brush to eliminate some of my paint strokes on the ends of my lines where the paintbrush hairs left little trails. And voila! DIY painted mural birch tree wall. 
diy birch tree wall art mural painting gray yellow


Next up on my office makeover is DIY painted IKEA storage boxes with a yellow chevron pattern. Here's a sneak peak:
painting IKEA paper cardboard boxes with yellow chevron


The Shabby NestChic on a Shoestring Decorating
Thirty Hand Made DaysCraft Junkie Too FriendFeatured On The  Crafty NestPhotobucket The DIY Show Off
Join  us Saturdays at tatertotsandjello.com for the weekend wrap 
 up           party!button UndertheTableandDreaming Somewhat Simple

Tuesday, August 23, 2011

Office Makeover Update! Yellow and Gray Awesomeness!

so, i am finally finished with the actual wall painting part of the project... dark gray-blue walls and bright yellow ceiling!  The pictures are looking a little more buttery yellow than sunshine yellow, but believe me, it's sunshiney!
yellow gray grey walls and ceiling office remodeling project ideas

yellow gray grey walls and ceiling office remodeling project ideas
And I have started on my DIY birch tree forest wall, I've done one coat of paint and it is nowhere near covering up the gray, so I probably should've invested in some primer, but at least each coat doesn't take too long with my little roller, so it shouldn't take too terribly long.  Here's my status:
wall birch tree painted forest DIY project
I'm taking pictures along the way, and I'll be back soon with a DIY painted wall tree tutorial.

I've also gotten a better idea of how I want the actual "office" part of my desk to look.  I was really inspired by this office I found on pinterest:
office white countertop green pattern curtains modern minimal
I love the clean modern look of the cabinet-inspired desk unit, and I started looking for countertops.  I want to build a custom drawer/cabinet/nook system to make sure all my paper/envelopes/supplies fit, so the hardest part was coming up with how to make a desktop.  I looked on a couple sites and was finding prices of over $100 for a 6 foot section of countertop, but then I found an Ikea countertop that is 8 feet long and only $39! The little problem is that 8 feet is a little too long to fit in/on top of my car, and no matter what you buy at ikea, it's $100 for them to ship it to you! I'll figure out something though.

I also decided I am finally going to get an Expedit shelving system from Ikea.  I've always wanted one, and I just kept waiting and waiting and the price kept going up and up, so at this point it's like $50 more than it was a couple years ago, and I'm sure it's not going down, so I'm just going to finally get one.

white ikea expedit 6x6 shelving system
I really loved the yellow interior of the shelves in my inspiration board for my office, so I started doing some research to see how easy/difficult it would be to paint the interior of the shelves, and I found ikeahackers.net, where people share their revamped Ikea furniture, and I found this post where a guy used contact vinyl on his shelves:
ikea hackers ikeahackers expedit unit painting interior vinyl shelves

I think it looks great and I'm looking into getting yellow vinyl on ebay.  I also really like the inserts for the Expedit system - there's one that's a door and one that has 2 drawers, but holy bejeezus those things are $35 each! Hello, you're IKEA!
Anyway, that's where I'm at right now in the office remodeling process.  I'm really excited with the vision I have in my head, and I'm hoping it's going to look as great in real life!

Tuesday, August 16, 2011

busy busy bee

Whoo! It's been busy around here... I've been painting my basement (dark gray walls and yellow ceiling) and of course the yellow ceiling is taking For. ev. er.  Apparently there's something about a bright yellow pigment that makes you have to do 3+ coats to make it look really even.  And apparently painting is hazardous to my health because I've got a crick in my neck, a bum knee and a sore thigh.  I've been painting in lieu of working out this week, and my mom and I just started a new weightloss challenge, so I'm hoping painting is a calorie burner!

I've got a couple Priss Designs shop announcements:
1.  I've put my Gray Chevron with Yellow Bird print on sale through Dibsie for the next 5 days only, a site where you can find deals on a lot of your favorite brands, including j.crew, anthropologie, world market, bcbgeneration, and more!
Here's the link to my sale: http://dibsie.com/deal/2613

2. Also, I completely lost track of my 30 day art challenge, but here's Day 30ish - I just added an abstract pattern that I created that is based on a peacock feather.
Available in the shop!


I'll post some updated office remodel pics soon, I'm trying to get the painting done before I start really thinking about the next step, which will be building a desk.  I was really inspired by this desk made of reclaimed hardwood flooring that I saw on the hgtv blog:
Video on the HGTV blog
I was thinking I liked the angle of the desk, but after measuring and realizing I need a desk that is 11 feet wide and at least 26" deep, I'm thinking the angle won't really work for me... however, I really like the look of the hardwood floor top, and it may end up being cheaper than buying wood planks.

And don't worry, I'll be doing a lot of ana-white.com research to figure out a good plan of attack for the desk.  I love love love her and her site.  Oh and if anyone wants to buy me a present, I would like a kreg jig please!
OK I'll quit asking for handouts.  Have a good week!

Wednesday, August 10, 2011

what i want wednesday!

Today I've got a special edition of What I Want Wednesday, because I am planning an office makeover!  I could really use some advice, because I am planning on painting the walls of my office dark gray.  My dilemma is that my "office" is in the basement, and there is a wall of windows so I get some light, but it's generally pretty dark down there and I'm wondering if the dark walls are going to make everything gloomy and depressing.  My plan, however, is to counteract the darkness with YELLOW!  There is a tray ceiling and I plan to paint both the horizontal and vertical part of the tray ceiling a bright yellow, and also all the furniture will be white with pops of yellow everywhere.  What do you guys think?
Here is my inspiration board for the space:
Oh I forgot to mention my plan is to paint or draw silver trees on the wall directly behind the desk, I thought it would be a good idea to just draw the outlines in silver paint pen like this example, but with silver on a dark gray background:
via pinterest, from seecatecreate
So for my "what i wants" today, I'll be focusing on cute office accessories for my new office remodel!

Cute gray flower pattern paper/storage boxes from Container Store
Yellow striped and patterned notebooks from Target
Asterisk clock: DIY tutorial on curbly

Silver and yellow floor lamp from Target